

How to add your Google Virtual tour to your website
A quick and easy guide
You’ve had your Google Street View virtual tour created, and it looks fantastic on your Google listing! Now, you’d really like visitors to see it on your own website too.
Embedding a Google Virtual Tour is very simple. Just follow these step, or pass a link to this page on to your webmaster and they’ll be able to integrate your virtual tour into your website with minimal hassle!
Step 1
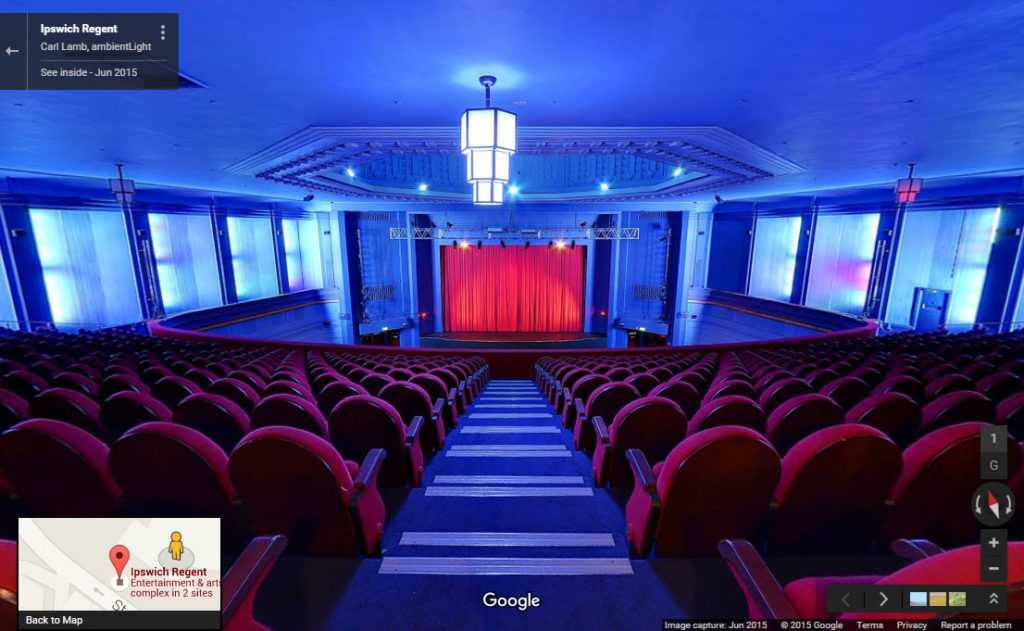
Head to any Google page where your Virtual tour shows and click on it so it fills the screen and looks like the image below. Navigate your tour and find a suitable view to start your tour and make sure that’s what you see on screen before the next step. You can choose any point you like! This is great if you want to show off different areas of your business on different web pages.
Step 2
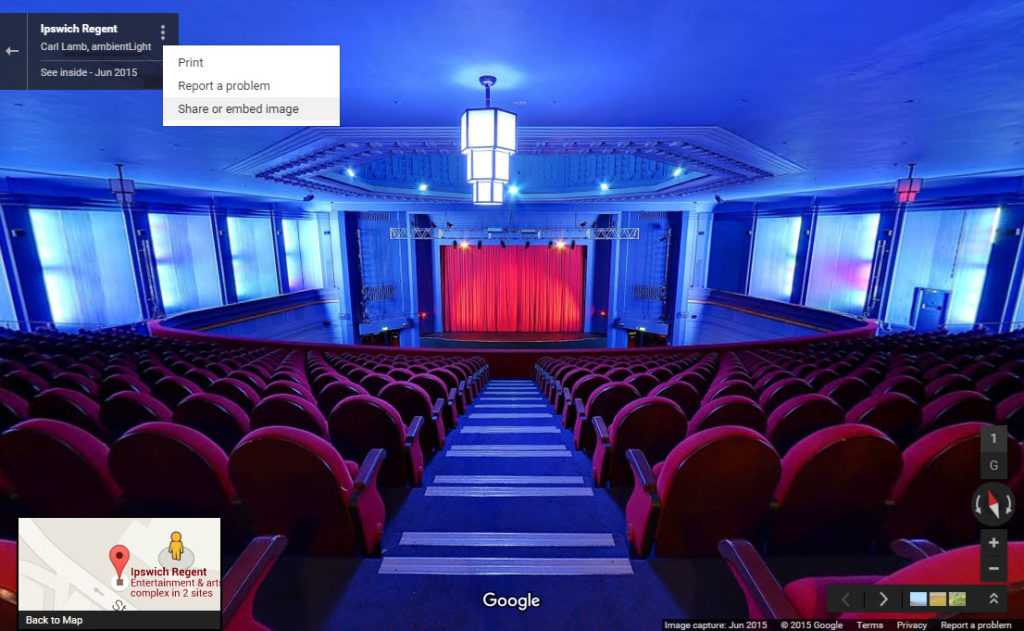
Click on the ‘three dots’ icon next to your business name at the top left of your tour and choose the ‘share or embed image’ option from the pop up menu.
Step 3(a)
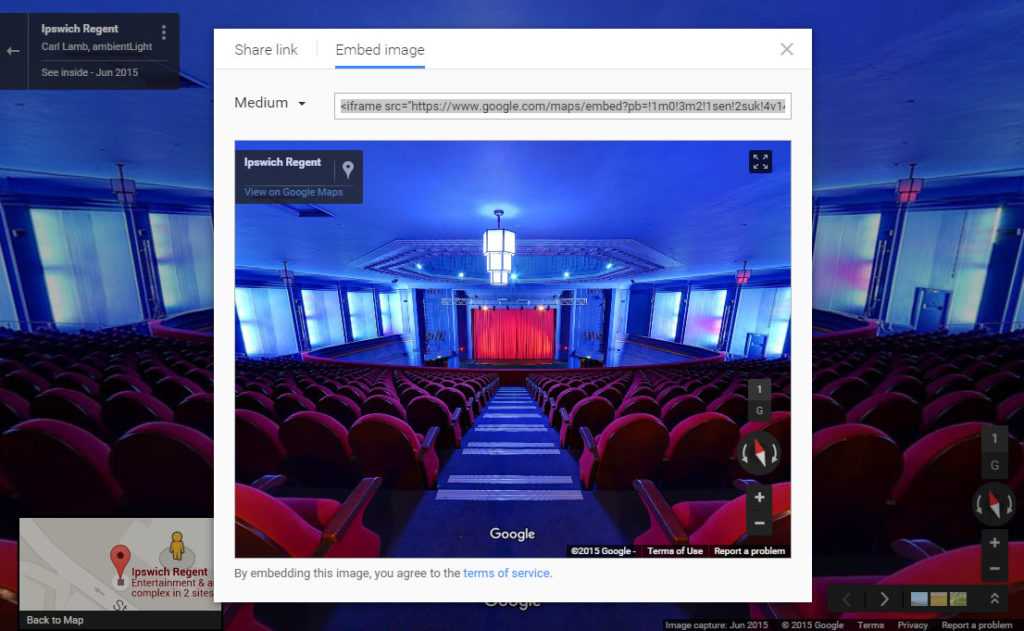
Choose from small, medium or large tour sizes with the button to the left of the code, then highlight the source code and copy it. If you need your tour to be exact size, choose ‘custom size’ from the drop-down box and see step 3(b)
Step 3(b)
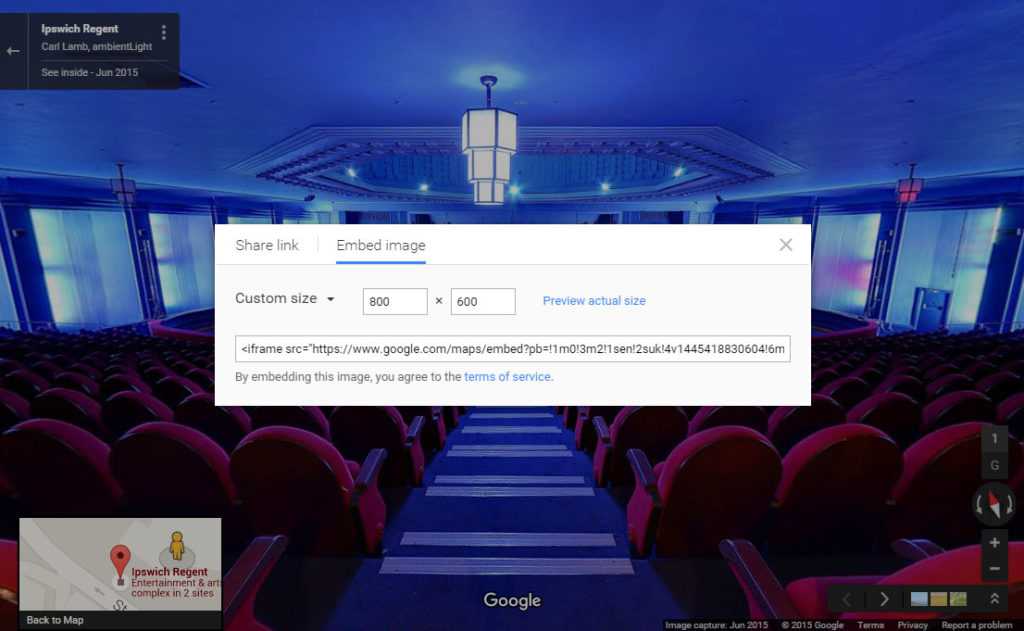
If you need your tour to be a specific size to fit a certain area of your website, fear not! By selecting the ‘Custom Size’ option, you can then choose the dimensions you need. Enter your chosen dimensions then highlight the code in the box and copy it before heading to step 4.
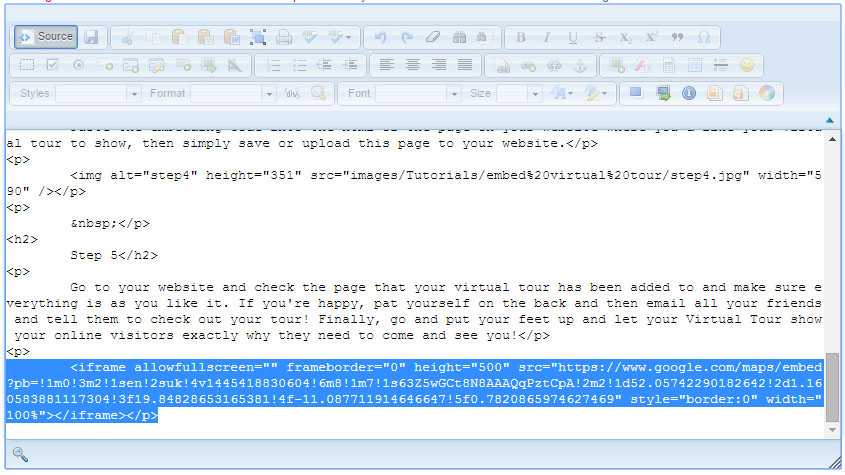
Step 4
Paste the embedding code into the HTML of the page on your website where you’d like your virtual tour to show. Once your code is pasted in I’d recommend you look at the code and change the width setting to 100%. This will ensure your tour scales to fit the device it is being viewed on. As a general rule of thumb, setting the width to 100% and height to somewhere between 450px and 550px tends to look good in most websites. Once you’ve done that save the page and your tour will be on your website!
Step 5
Go to your website and check the page that your virtual tour has been added to and make sure everything is as you like it. If you’re happy, pat yourself on the back and then email all your friends and tell them to check out your tour! Finally, go and put your feet up and let your Virtual Tour show your online visitors exactly why they need to come and see you!
Here’s the code used in the example embedded right below. Take a look around the historic Regent Theatre in Ipswich. Easy wasn’t it!